Introduction
A few months ago, I deployed an AngularJS app called SeafoodCheck on an Amazon EC2 instance. It wasn’t a trivial task and I had to go through various tutorial and stackoverflow pages to get it working. To help people in similar positions as I was, I created this “Deploying an AngularJS app to Amazon EC2” tutorial.
This serves as the Part II of this tutorial aiming to provide a step by step guide in running an Angular JS app on an Amazon EC2 instance. If you don’t know how to set up an Amazon EC instance, Part I of the tutorial published ealier described how to set up an Amazon EC2 instance.
Prerequisites
- An AWS EC2 instance set up
- Basic Git knowledge and a working Github account. Hello World on Git and Github if you need.
- Basic command line knowledge
- Basic knowledge of Node.js
Fork AngularJS app code
For this tutorial, we’ll be using the PhoneCat Tutorial App from AngularJS. This is the offical tutorial from AngularJS. I highly recommend you to go through if you are starting on AgularJS.
To begin, let’s fork PhoneCat Tutorial App on Github. You should then have a repo under your name like this forked from angular/angular-phonecat.
SSH into EC2 and git clone code
Now SSH into your EC2 instance. Type ls to see the directories. You should see something like the following:
 Now do the following:
cd apps
sudo chown -R bitnami /opt/bitnami
sudo chown -R bitnami /home/bitnami
git clone https://github.com/yaoyuyang/angular-phonecat {USE YOUR LINK}
The chown steps are very important since the default owner for these two directories, which will be used later to write files, are root. If you don’t change the ownership, you have to install everything under root and a lot of permission problems will pop up later.
Run the app
Before you run the app, edit the package.json using your favorite editor. Replace localhost with 0.0.0.0. This step and the Security Access steps in the next section expose your app to the public internet.
Now you can run the app by the following:
cd angular-phonecat
npm start
You should see something in the terminal like:
Starting up http-server, serving ./app
Available on:
  http://127.0.0.1:8000
  http://172.31.6.114:8000 (This will be your private IPs)
Security Access
Your Angular app is now running. However, you need to configure the security access on AWS before you can let the world to see your app for real.
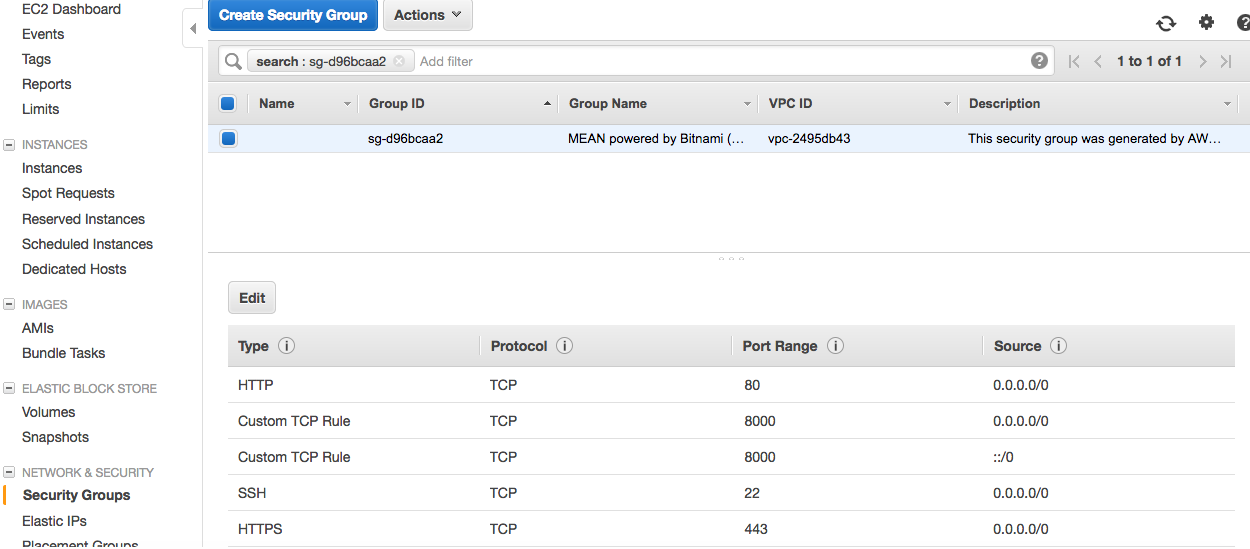
Open up your AWS EC2 dashboard, click Security Groups on the left panel. Click on the row that has Group name MEAN powered by Bitnami. Then click the inbound tab beneath. We need to customize the rules to make port 8000 accessible. Click Add Rule, leave Protocol default as TCP, in Port Range enter 8000, and Source choose Anywhere. Click Save. Refresh and you should see the following:
Check out your running app on browser
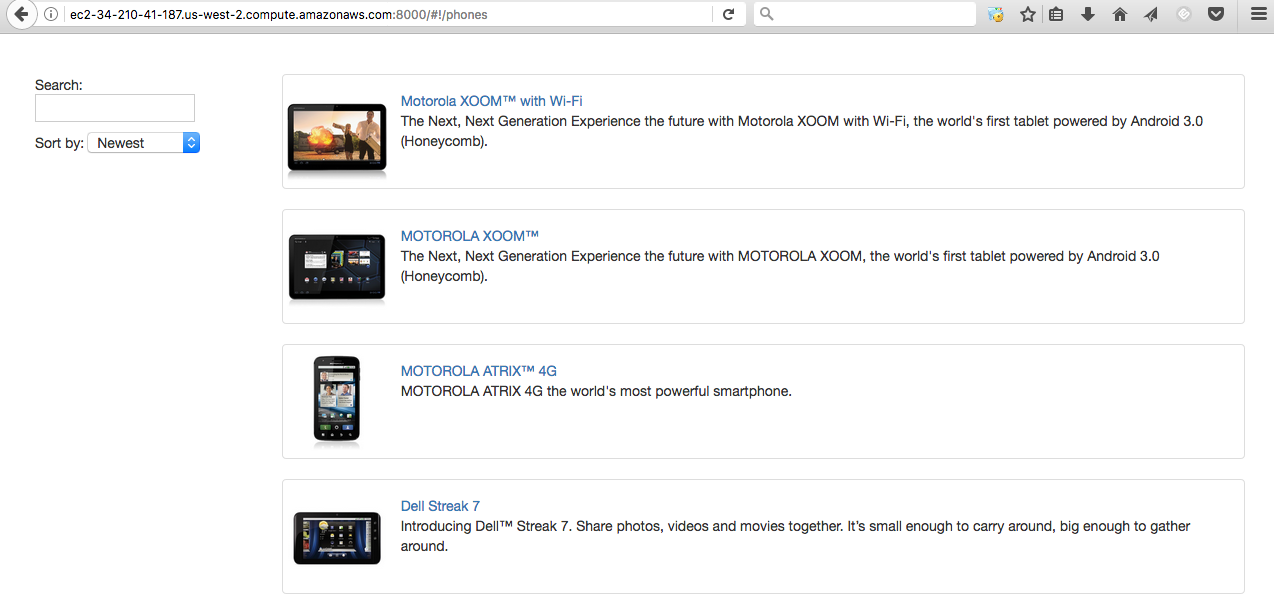
After we give the security access. We can now access our app through a brower. Type in your Public DNS:8000. In my case it’s http://ec2-34-210-41-187.us-west-2.compute.amazonaws.com:8000. Hooray! You should now see the Google Phone Gallery up!
Forever run
To keep the app running continuouly without being affected by logging out of EC2 instance. We use the node package forever.js. First ctrl+c to stop the existing app running. Install the package:
sudo npm install forever -gAnd then start the app by:
forever start ./node_modules/http-server/bin/http-server ./app -p 8000 -d falseTo stop the app. Use forever list then forever stop with the id, e.g. forever stop 12305.